

This article is Part 4 of a five-part series on Atlassian Single Sign-On. Part 1 | Part 2 | Part 3
Praecipio has partnered with our friends at resolution to bring you a series of blog posts on how to successfully implement Single Sign-On (SSO) with Atlassian tools. Resolution is an Atlassian Gold Marketplace Partner based in Germany that specializes in software development and network security. With more than 7 million users from 58 countries, resolution is the market leader for Atlassian Enterprise User Management Apps.
To identify realistic solutions, Part 3 of this series reviewed the top SSO requirements for Atlassian Data Center applications:
- Are usernames consistent across user directories?
- Are there multiple sources of identity?
- Do you need to centralize user management on your Identity Provider?
- Is there a need to automate user activation and deactivation?
Then, we mapped possible responses to competing alternatives so that you could tell when Data Center SAML could do the job, and when it would be better to look for an alternative in the Marketplace. Go back to our detailed comparison if you want to dive into the enterprise customization options!
In the following two articles, we will see the four requirements come together in a killer implementation of resolution’s SAML SSO. Let’s follow the steps of ACME Services Ltd*!
*ACME is (obviously) an imaginary company based on the hundreds of customer implementations that our support team has guided to completion.
The Starting Point
- As part of a larger effort to centralize user management, the company ACME Services has decided to migrate their Jira and Confluence users from a local Active Directory where users log in locally with a username and password to Azure AD. SAML SSO will be used to connect with the Atlassian applications.
- ACME works for specific technology projects with Contractor Unlimited, a large consulting firm. Consultants will need access to ACME’s Jira and Confluence applications with their existing Contractor accounts, hosted in Okta.
- Only the contractors assigned to projects can have access, which should be revoked as soon as their assignment concludes. This step will be explored in Part 5 of our series.
Note: While the scenario includes both Jira and Confluence, we will only cover the implementation in Jira as an example. Keep in mind that the steps are virtually identical for both applications.
1. Migration from the local AD to Azure AD
Challenges
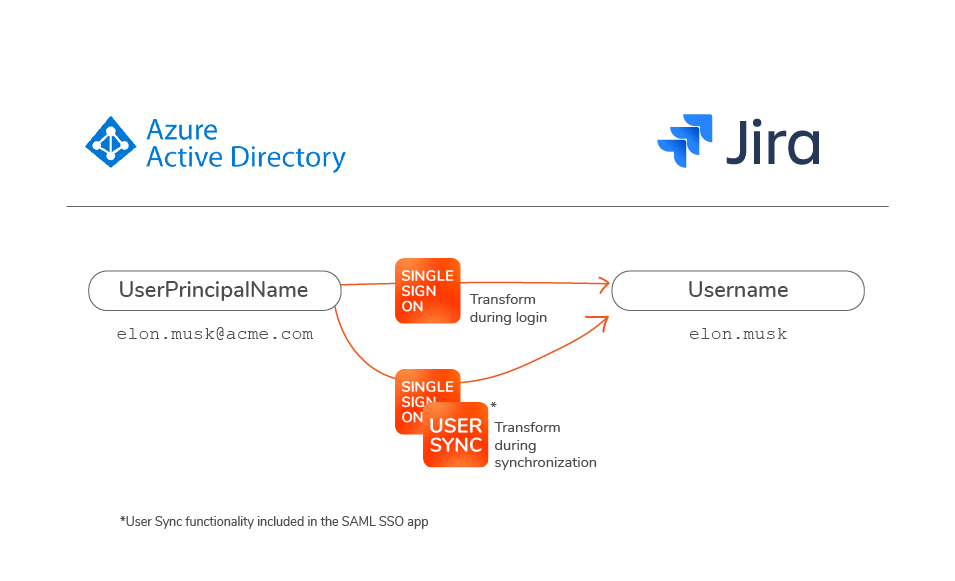
- Usernames sent from Azure AD are different from the local Atlassian usernames: first.lastname@acme.com versus first.lastname
- ACME has a central IT department separated from the team of Atlassian admins, and collaboration between both teams takes time. To increase the speed of the implementation, ACME has decided to transform usernames on the Atlassian application.
- Users from Jira must first migrate to Azure AD since it’s a historic instance with thousands of existing tickets.
Prerequisites
In this guide, we will focus on the critical tips and tricks but will assume that you already have a basic working configuration that includes:
- Creating a User Sync connector for Azure AD following the Configuration Guide for Azure AD. Do not sync yet! It's best to wait until the implementation is complete.
- SAML SSO configured with your Azure AD. (Here is the guide)
- Having read, understood, and followed our guide on how to migrate the Jira/Confluence internal directory to User Sync to retain user history, groups, etc.
It’s convenient to configure User Sync and SAML SSO in this order so that you can select an existing User Sync connector to provision your users during the SAML SSO setup.
Important note: Migrations can be messy, so it’s fine if you have trouble solving the 3 prerequisites above. Don’t be afraid to ask for help from either Praecipio or resolution – we regularly host free screenshare sessions with our customers to get their SAML SSO implementation ready for production!
Implementation Steps
In this walkthrough, we’ll implement username transformations on both the SAML SSO login process and the User Synchronizations via API. You may be wondering why the transformation must be completed on both sides. We asked one of our engineers, and here's what he said:
"What happens when the SAML SSO app searches for a user during login and the user is not found? The login will fail. That's why you need to keep the transformations consistent on both sides. If User Sync creates a username “example” stripping the email domain that is stored in Azure AD, and then SAML SSO searches for a user called example@domain.com without stripping the domain before looking it up, it will fail to find the user."
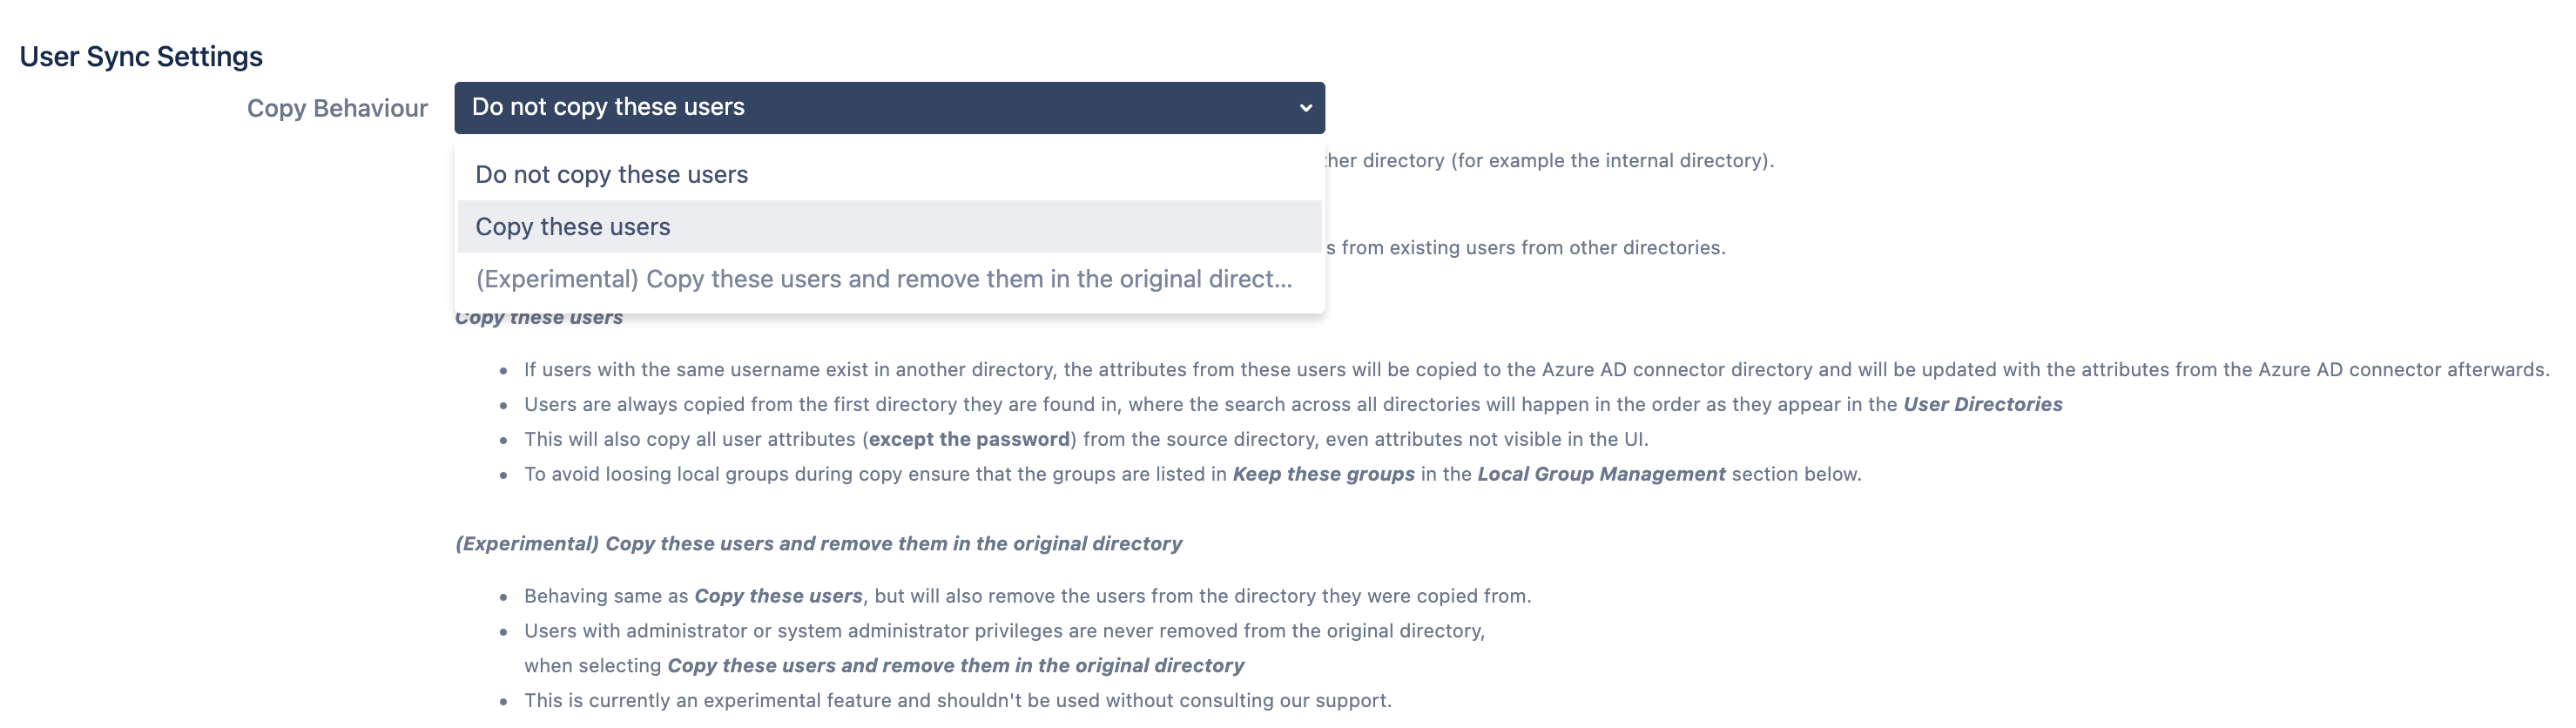
- First, let’s instruct the User Sync Connector to copy user attributes from the local directory into Azure AD whenever a user is created.
- Now we need to configure how usernames will be transformed as they are synchronized into Jira/Confluence from Azure AD
- Go to Attribute Mapping in the advanced User Sync settings, and click on Edit for the username row

- Go to Attribute Mapping in the advanced User Sync settings, and click on Edit for the username row
- Now it’s time to add the transformation. Here’s the regex example that would do the job of transforming elon.musk@acme.com into elon.musk:
Regular expression: ^(.*)@.*$
Replacement: $1
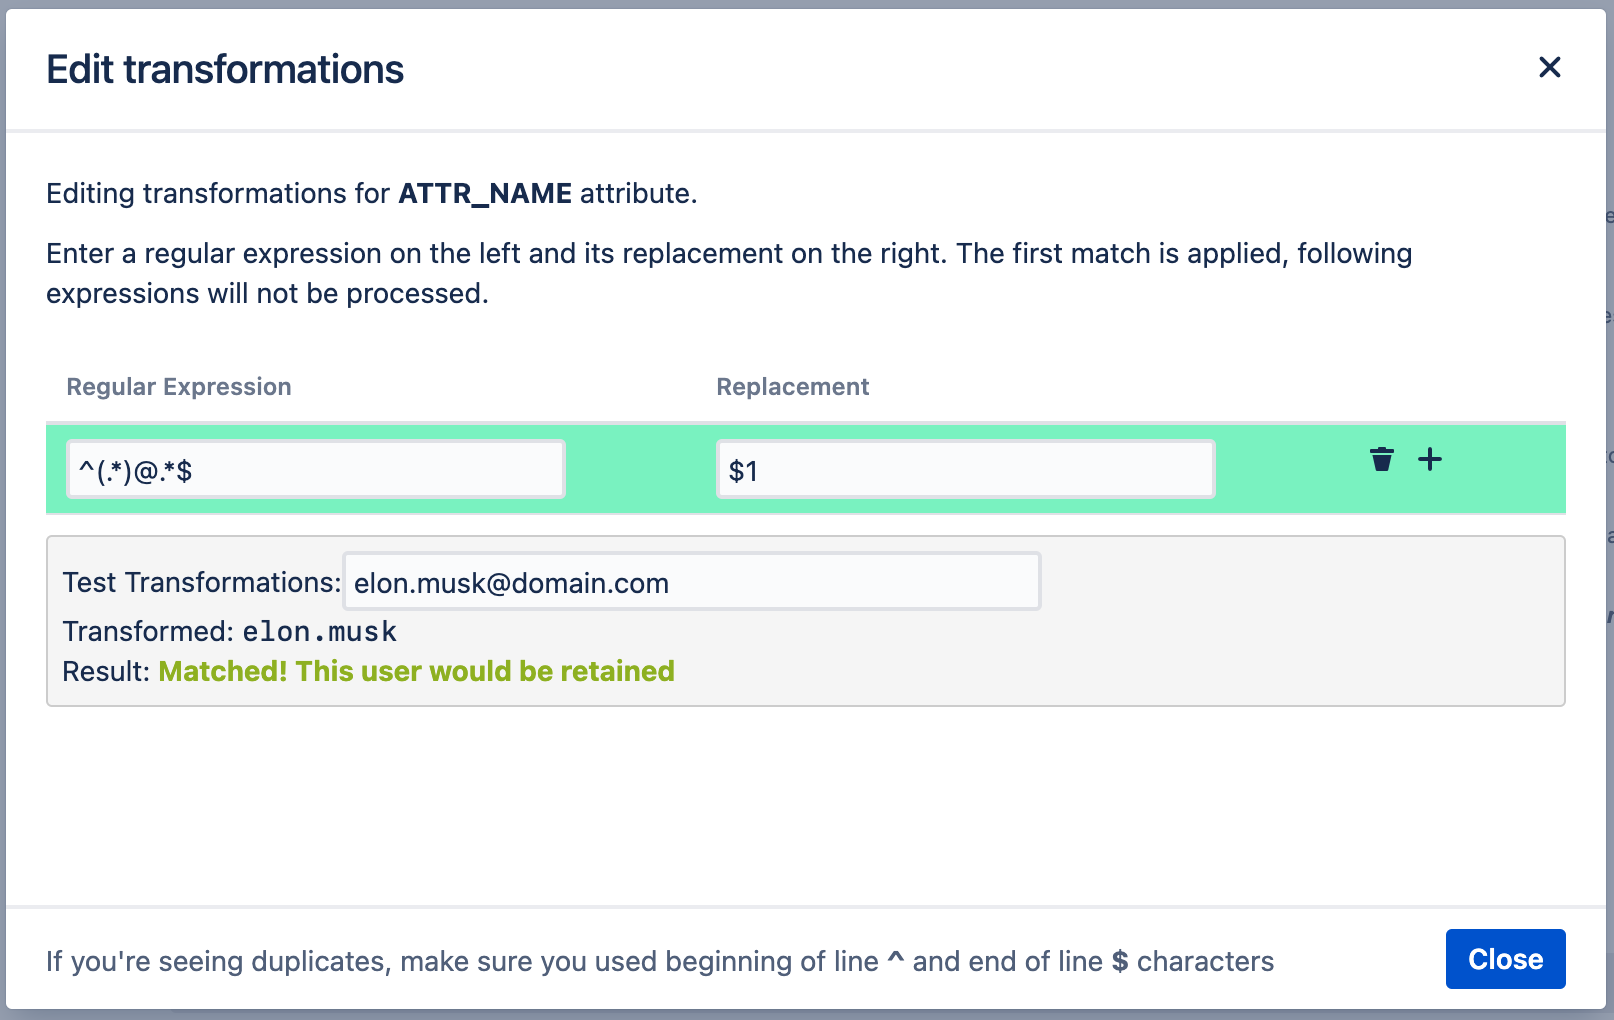
- As in the example above, you should test with a real user whether the transformation works.
3. Now we need to configure the same transformation in SAML too.
- Go to Identity Providers > User Creation and Update > Attribute mapping and click on Edit for the Name ID / username row
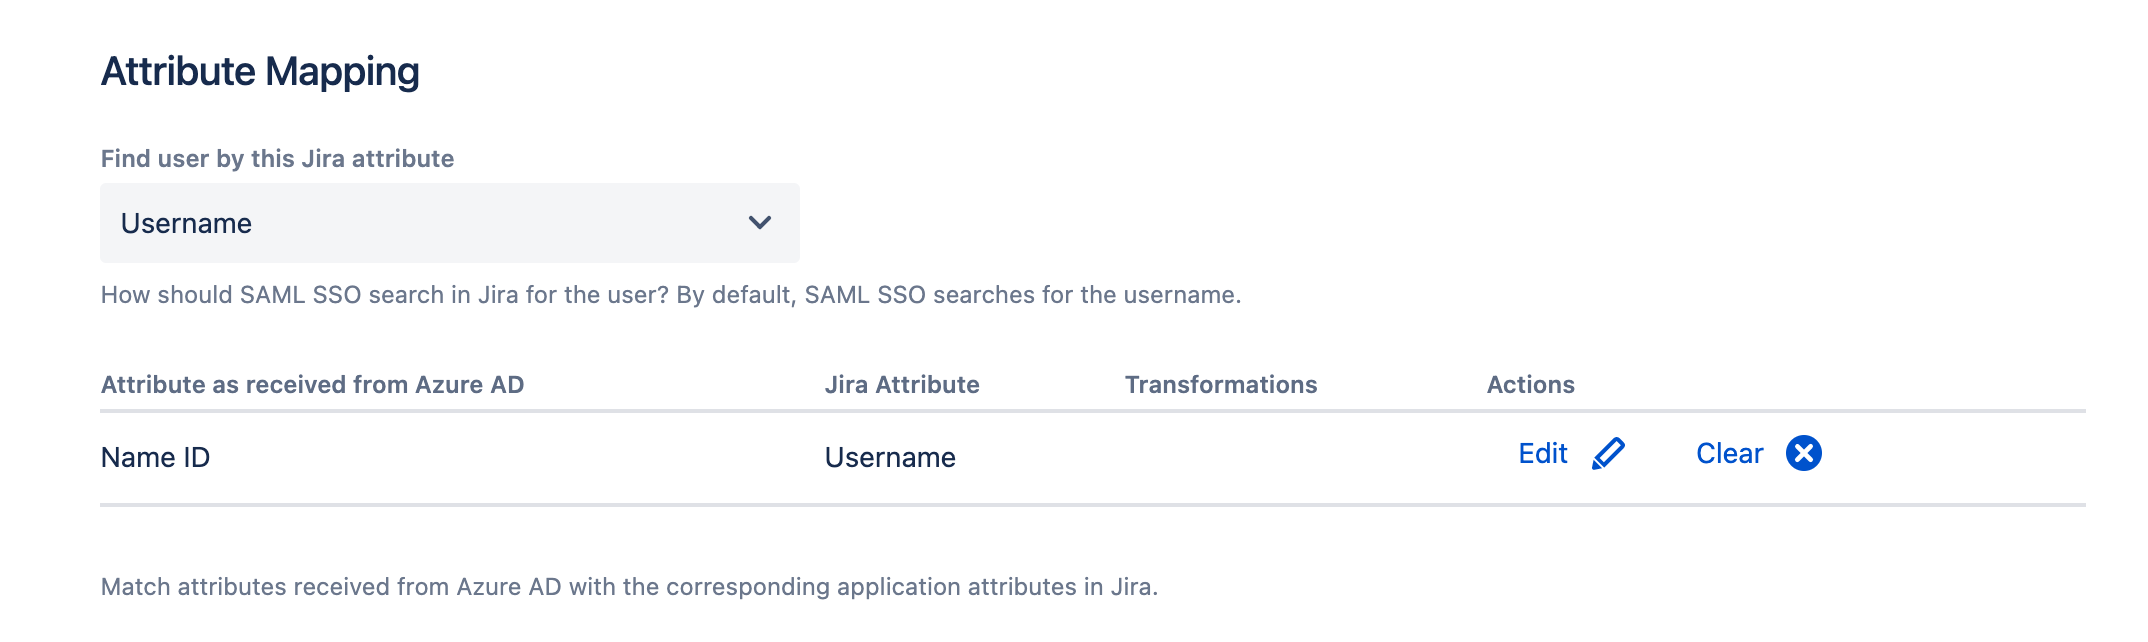
- Use the template from the dropdown to strip the email domain
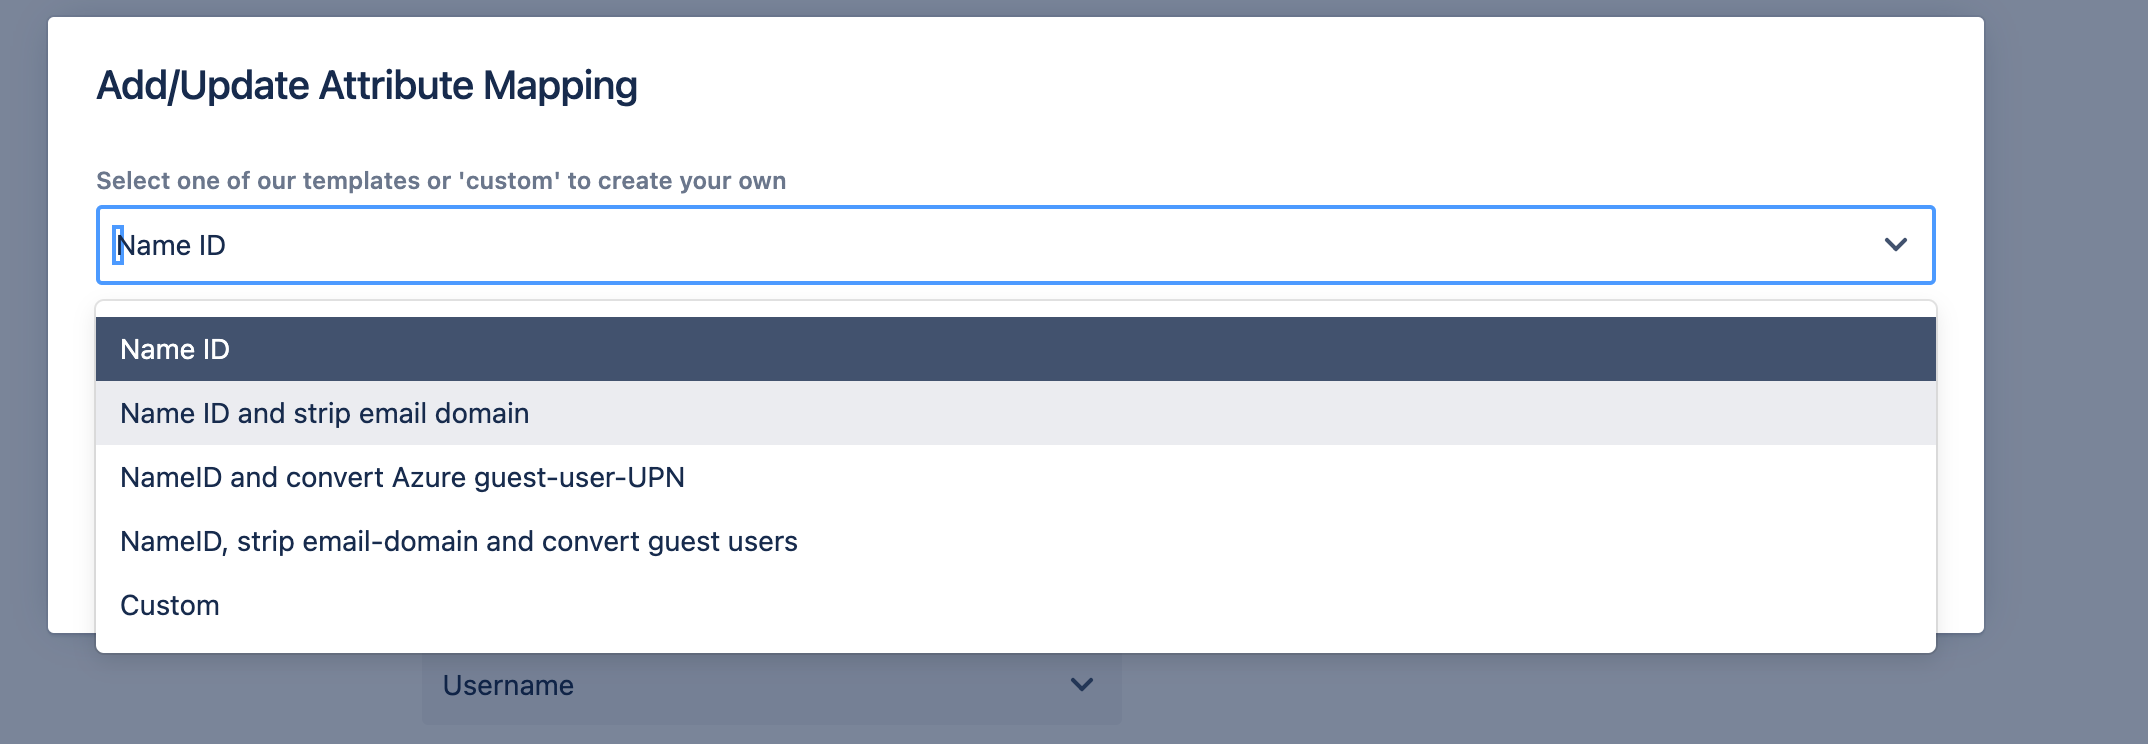
- Click apply and save your SAML configuration.

Note: The no-code option to strip the email domain from a dropdown will be included in the upcoming release of User Sync, both as a standalone and as a feature of the SAML SSO apps.
4. Finally, ACME must change the priority order of the user directories, so that the User Sync directory is above the local one. To do this, go to User Management > User Directories in the admin section of Jira, and move the Azure AD directory to the top.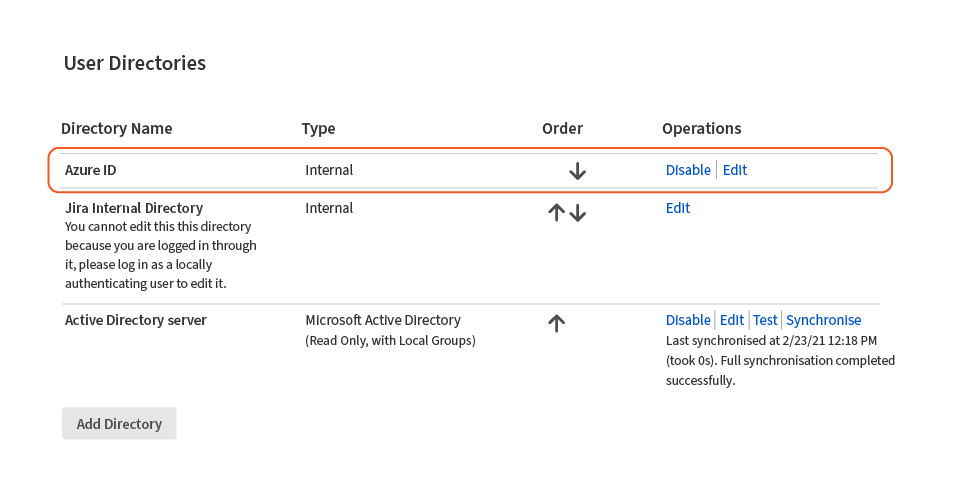
5. Connecting users from multiple organizations into the same Jira
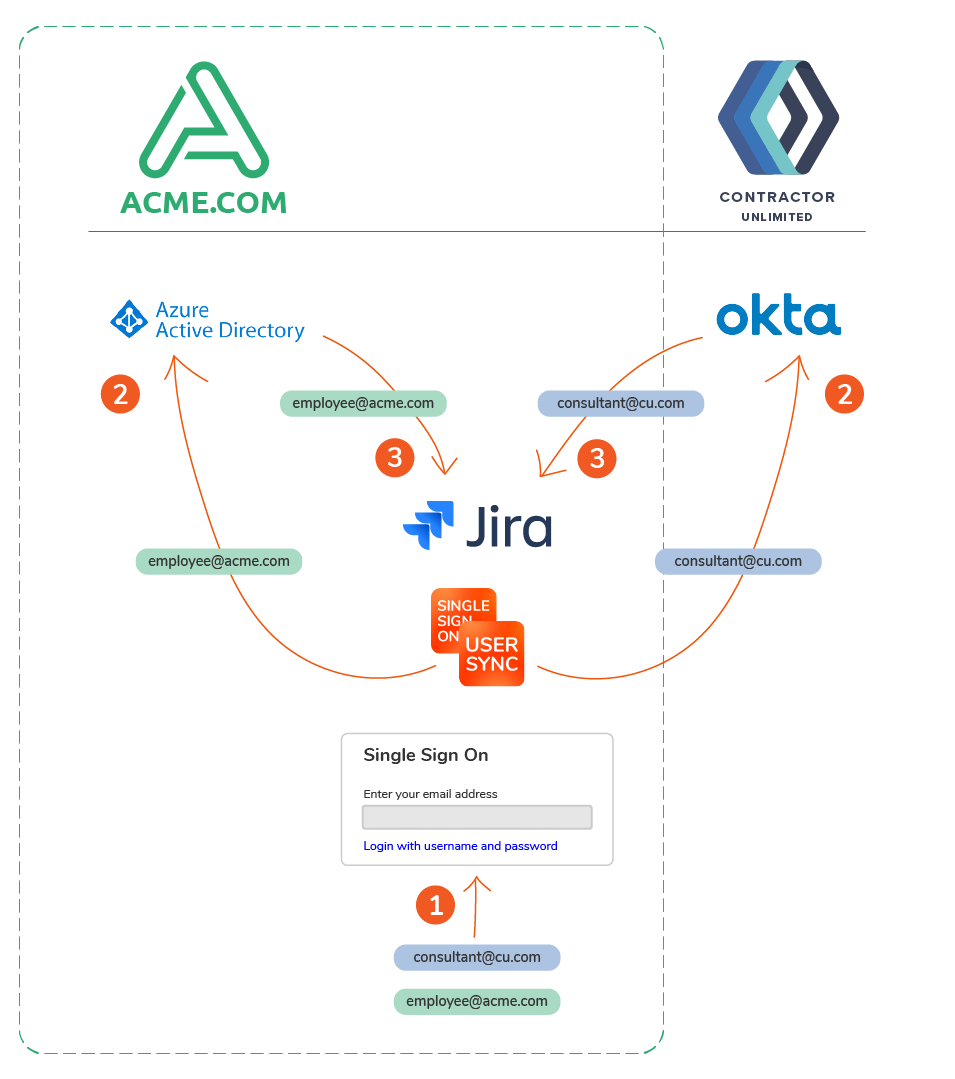
After the initial setup, Contractor Unlimited (CU.com) need access to Jira/Confluence. Since they also want to use SSO connected to their Okta, a new UserSync connector is configured for Okta.
Challenges
- Implementing the most appropriate method of combining both Identity Providers (IdPs).
The final decision is that Okta should be triggered based on the Contractor Unlimited email domain. An alternative would be to show an IdP selection page where users can select whether to log in with Azure AD or with Okta. However, the central identity team at ACME prefers the ACME login to be a more branded experience without a reference to Contractor Unlimited’s Okta.
Prerequisites
- Setup Acme's SAML SSO, now with the Contractor Unlimited's Okta instance. Follow this guide.
- Configure a User Sync connector with their Okta. Follow this guide.
If you want to know more about the different IdP selection methods, you can watch this video tutorial.
Implementation steps
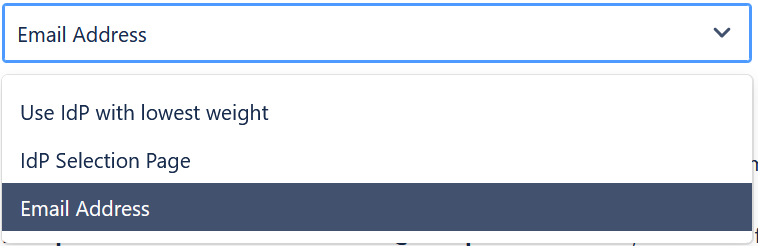
- Go to SAML SSO > IdP Selection
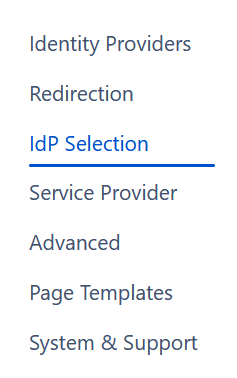
- In the dropdown, choose select IdP by Email Address
- Now, let’s create a new rule item so that CU.com emails are routed to Okta for authentication
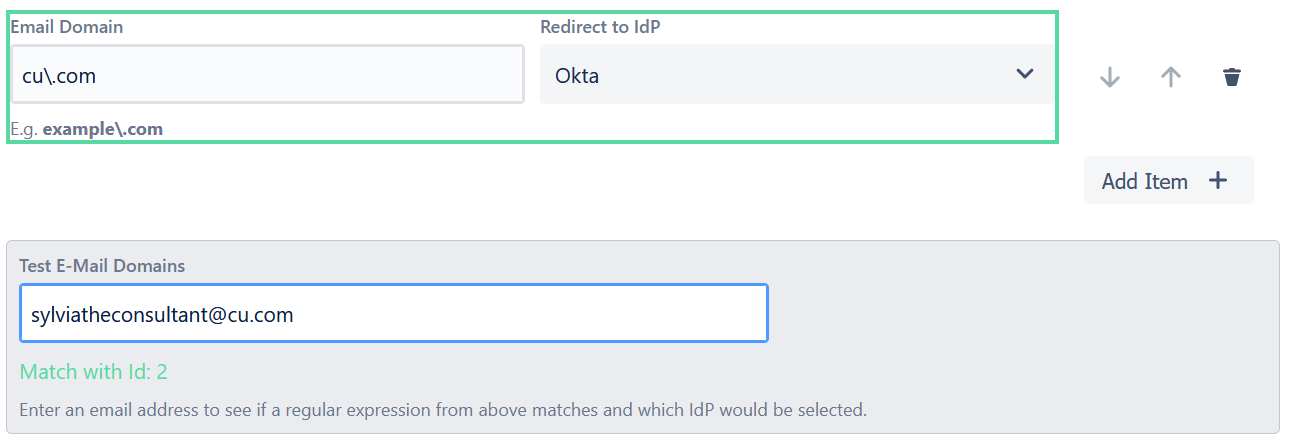
- In the rule, we’ll add the domain in the corresponding field. In this case, cu.com becomes cu\.com

- Now, let’s test the email of any contractor to check whether the rule is triggered.
- Let’s now repeat steps 3-5 for acme employees and Azure AD.
- Finally, ACME decides to tweak the selection page a little bit so that it has the right look and feel.
To do that, they go to the page templates section of the SAML SSO configuration
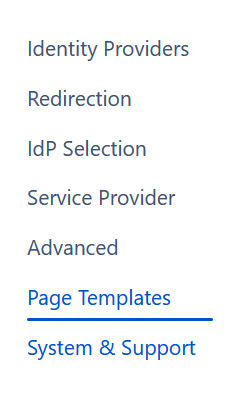
and navigate to the IdP Selection By Email Page Template (2nd template)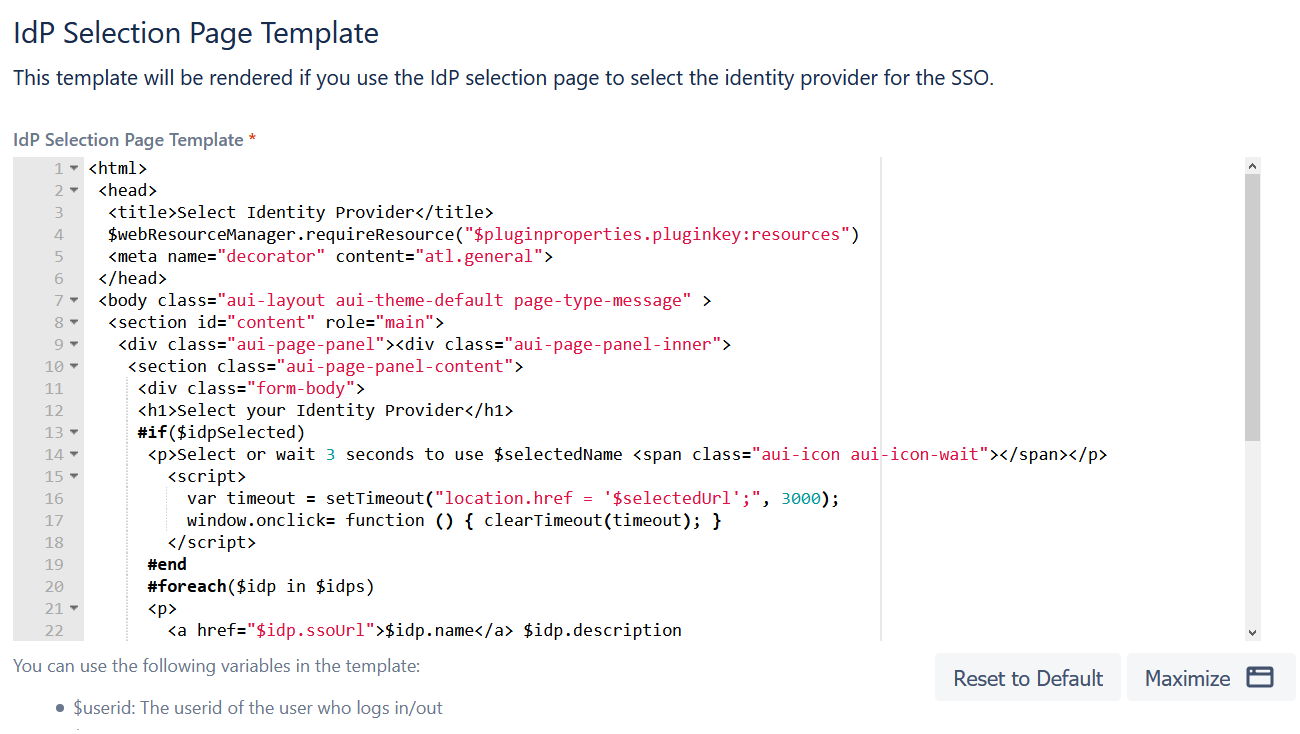
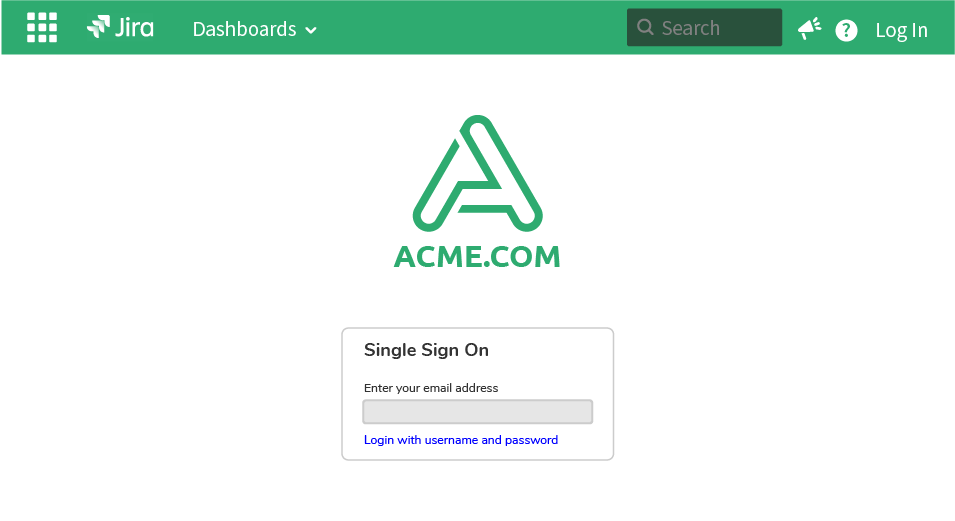
- And that’s how it looks like for them by simply changing the font and adding their logo!
Next Steps: Setting up an automated process to provision and deprovision consultants
At this point, CU employees have access to ACME's Atlassian tools. The door is open. But ACME still has to make sure that the door can be closed so that only CU.com contractors who are actually needed can get in.
In Part 5, the final article in this series, we’ll look at how to set up an automated process for onboarding and offboarding contractors so that they always have access when they need it, and they immediately lose it when their project is over--without manual work, and without any bottlenecks.
Read the rest of our Atlassian SSO Series:
